Digital Photography and Imaging | Week 4

WEEK 4/14/05/2024
Lectures - Introduction to Photoshop 3
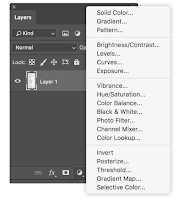
1. Adjustment Layer
- non-destructive image editing tools that add color and tonal adjustments to your image without permanently changing its pixels
- With the adjustment layers, you can edit and discard your adjustments or restore your original image at any time

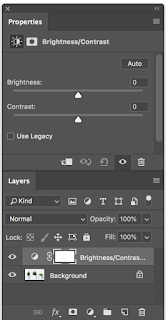
1.1 Brightness / Contrast: adjusting the highlights / adjusting the shadows

1.2 Level: modify the tonal values in an image by adjusting the levels of the shadows, midtones, and highlights

1.3 Curves: adjust as many points as you want throughout the entire tonal range, and is the most powerful and precise tool for editing the tones in an image

1.4 Exposure: Adjust exposure levels with three sliders (Exposure, Offset, Gamma)

1.5 Selective Color: Selectively modifies the amount of a primary color without modifying the other primary colors

2. Filters
- To edit photos is an essential element of Adobe's graphics editor
- Change colour, add blur or create completly new image effects
YouTube Link: https://youtu.be/gDSbfx67MLg
Tutorial - Demo
Mr. Fauzi explains:
1. Match Lighting. Adjustment layers. Filters
- At the bottom of the layer part is a row of icons, a half-shaded circle for Creating a new adjustment layer
- Press "levels" to adjust the layers
- We can freely adjust this Brightness/Contrast adjustment layer without saving alternative versions of the file
2. Photoshop Pen Tool
- Trace and crop the images using the Pen tool
Practical - Project 1B: Digital Collage Review
1. Exercise
- Working with layers
- Adjustment Layers & Filters

Comments
Post a Comment